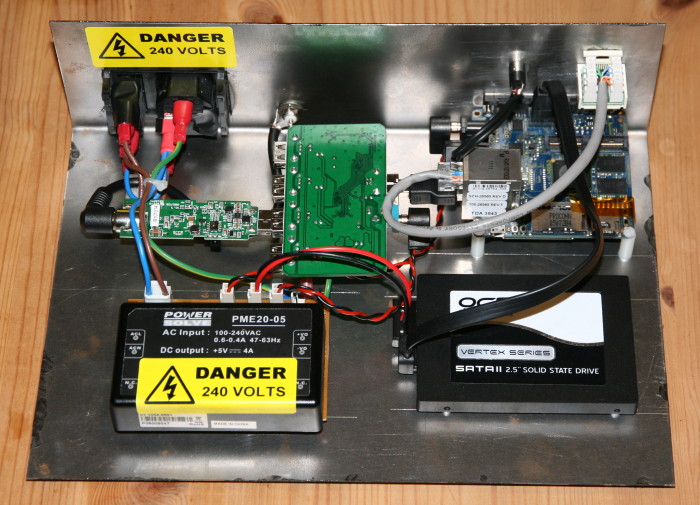
The case has a steel base and back to which the iMX53 board, SSD, USB hub, DVB-T dongle and power supply have been fitted:
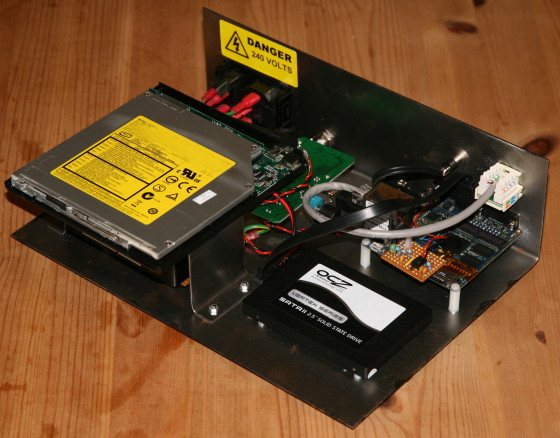
The DVD drive is then mounted above the power supply on a steel shelf:
I experimented with various layouts for the components and settled on using an A-male to B-male USB adaptor to place the USB hub to the side of the iMX53 board, upside down. A worry was that this put the DVB-T RF circuitry close to the noisy mains wiring, but that doesn't seem to have caused any problems so far.
Connectors take up a lot of space, especially USB. I am using a lot of right-angle connectors as they can help to make things a bit more compact.
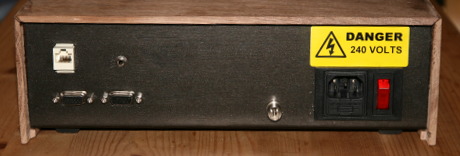
I paid my local metal supplier, a company who claim to have had Ernest Rutherford as a customer, to cut the metal to shape, bend it, and to cut out some of the more tricky holes on the back panel. This was definitely worthwhile as I have always found drilling and filing to make square holes very tedious and they have made a very neat job. Here is the base and back and here is the shelf as SVG files that you can view using Inkscape. I then painted the outside black.
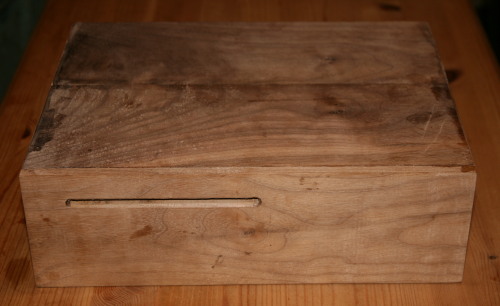
I wanted to make an attractive case since it will sit under my TV and be looked at a lot. Wood can look nice and also has the advantage of letting radio through; not shown above, there is also a wireless keyboard receiver inside.
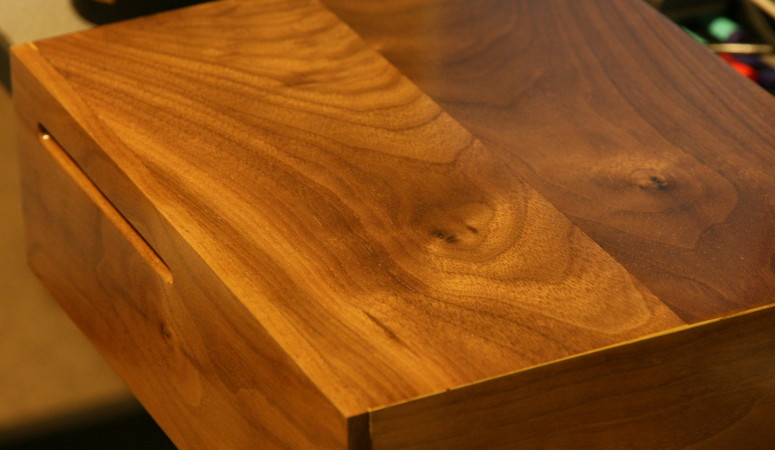
I chose to use a 19 x 110 x 1000 mm piece of American Black Walnut from British Hardwoods Online. My friend Dave kindly allowed me to use his workshop to turn that into a box and taught me how to do it without slicing my fingers off. The front is a full-thickness 19 mm panel; we used a bandsaw to make half-thickness panels for the top and sides. The two pieces that make up the top are "unfolded" so that the grain is reflected.
The DVD slot was cut with a router, and on the inside there are slots into which the steel base slides. Everything is glued together with epoxy. The front panel has a rebate into which the other panels fit; the tops meet the sides with a 45-degree mitre.
Getting an attractive finish on the wood has taken a lot of research and a lot of time. My final recipe is:
Latter steps don't hide blemishes in earlier steps; rather, they tend to accentuate them. So don't be impatient and keep sanding until the result is perfect before continuing.
I am pleased with the result, especially with how the mirrored panels on the top swap colour as the viewing angle changes:
The cellulose sealer and lacquer are not easy to obtain in the UK because the solvents are unpleasant and restricted to "professional" users (I did most of the work outside). They are available online.